初识AI之设计稿楼层识别
本文不包含底层数学基础,目标是利用已有算法和模型实现需求。
业务背景
从长设计稿上识别多个楼层进行分割,得出分割区域坐标。
本文使用的深度学习工具为TensorFlow。主要通过改造官方例子,来训练自己的模型并测试效果,其中模型训练部分通过python实现,效果测试由前端页面展示。
项目地址:https://github.com/winniecjy/floorDetection
demo地址:https://winniecjy.github.io/floorDetection/
最终效果如下:
制作数据集
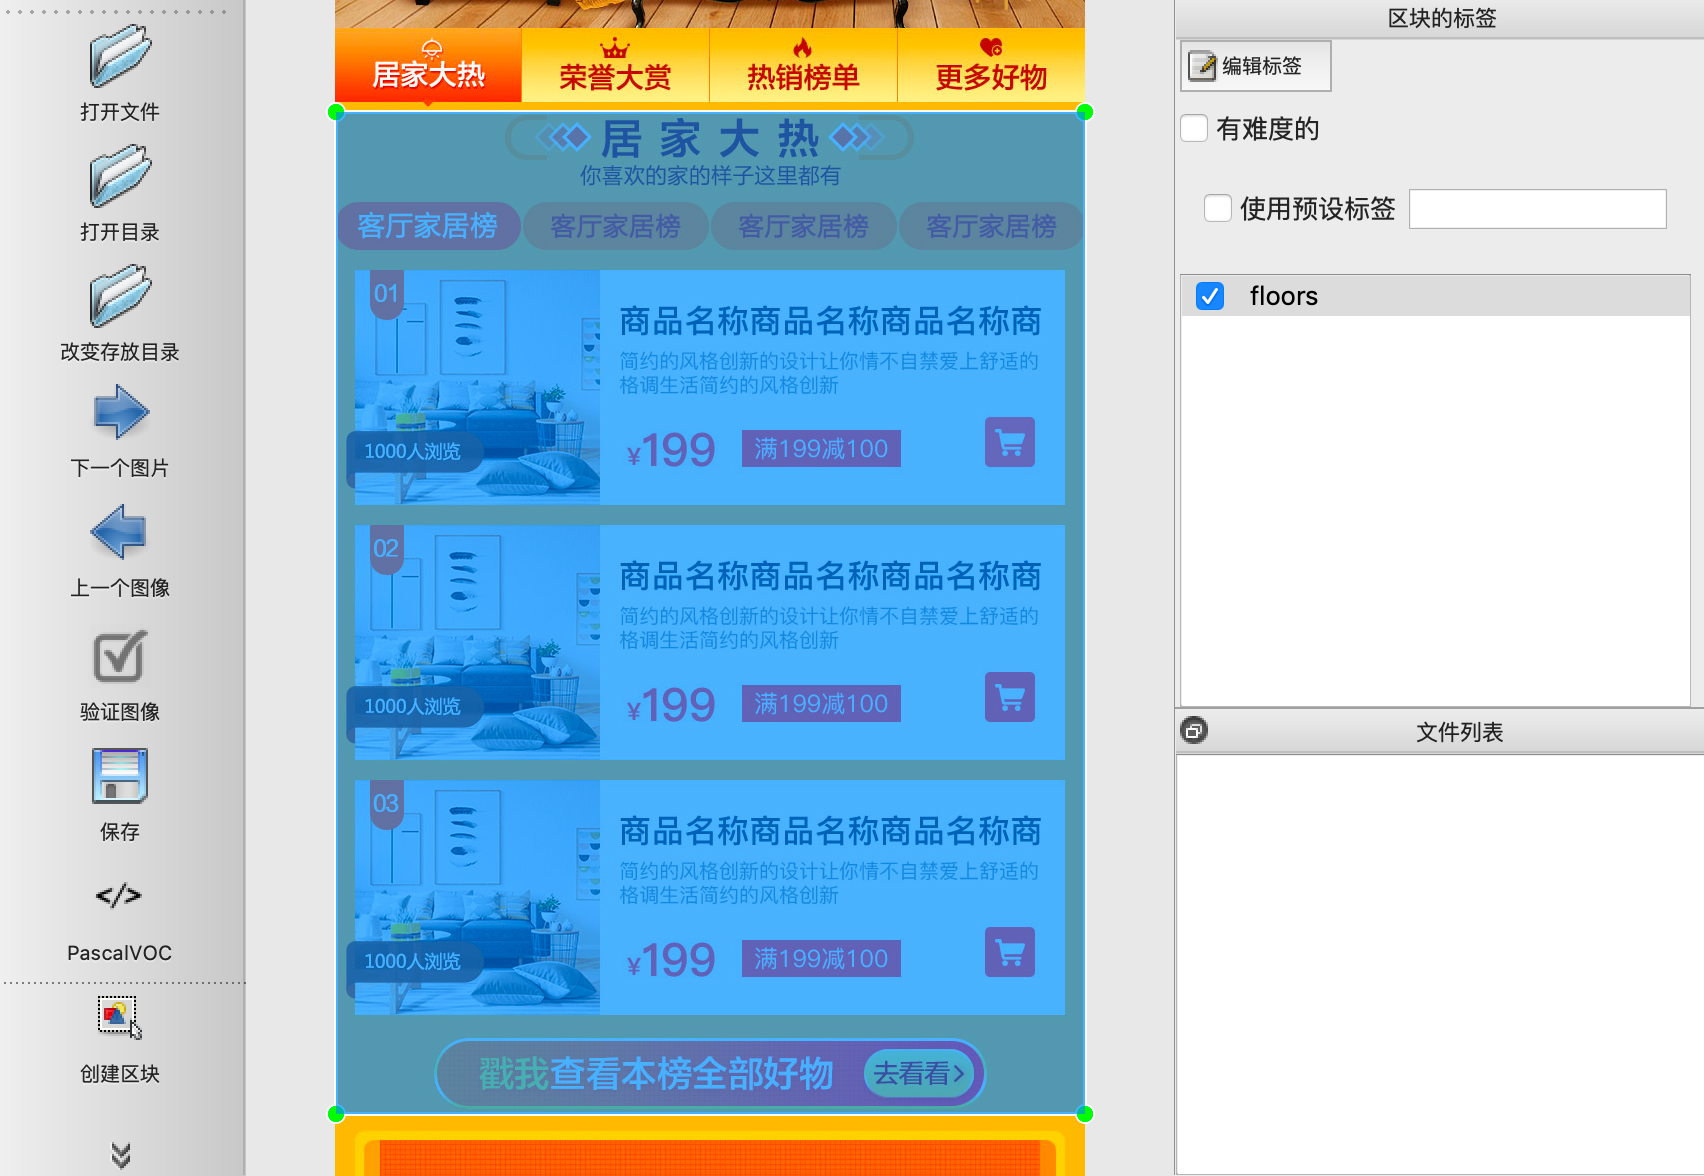
这里使用labelImg来标注检测目标,MacOS下的安装步骤如下,其他系统可参考https://github.com/tzutalin/labelImg:1
2
3
4
5
6
7pip3 install pyqt5 lxml # Install qt and lxml by pip
git clone https://github.com/tzutalin/labelImg.git
cd labelImg
make qt5py3
python labelImg.py
python labelImg.py [IMAGE_PATH] [PRE-DEFINED CLASS FILE]

这里在花瓣网上找了100多张会场设计图来进行处理。将图片一分为二,一部分作为训练集,一部分作为测试集,训练集和测试集比例为2:1,分别放在两个文件夹train和test中。标记完成后,每个图片都得到一个对应的xml文件描述了对应的区域标注。
数据集处理
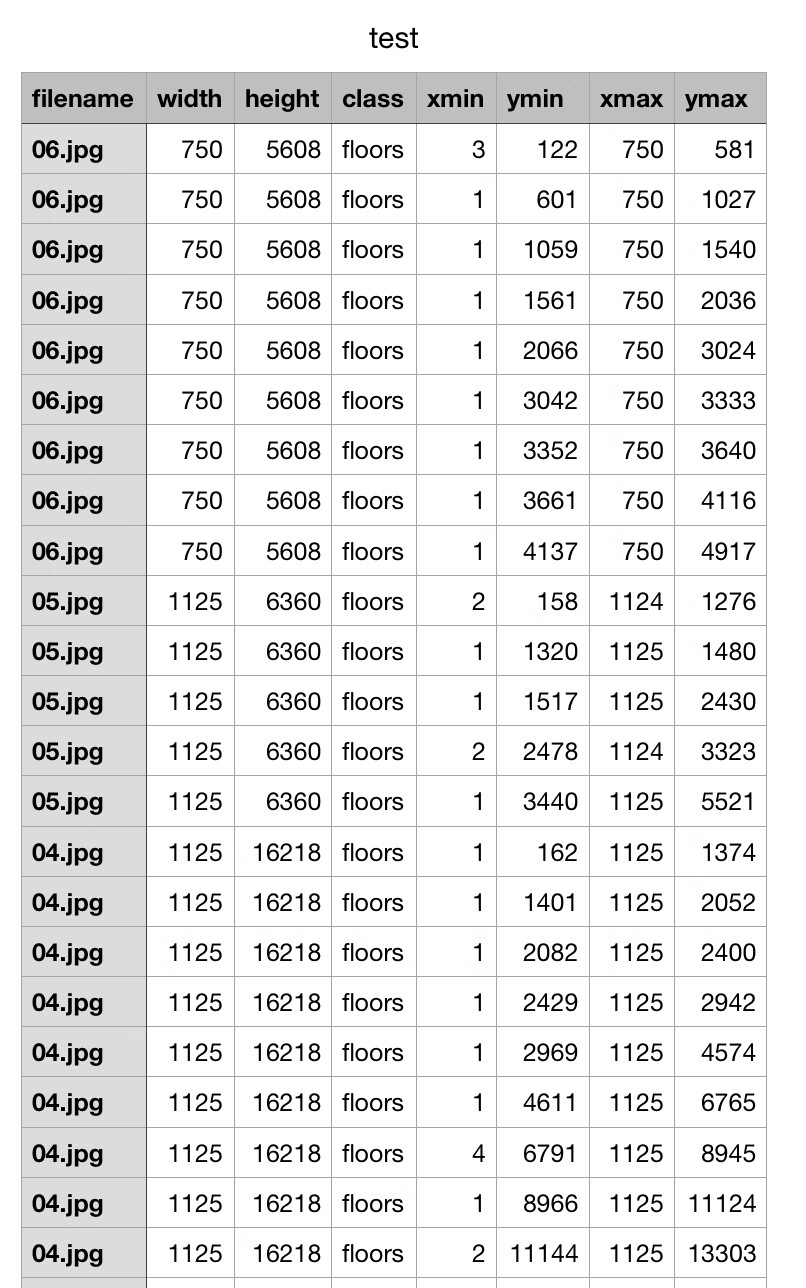
xml合并为csv
把所有的xml合并到csv文件,把以下代码复制到一个python文件中,需要修改两处位置:1
2
3
4
5
6
7
8
9
10
11
12
13
14
15
16
17
18
19
20
21
22
23
24
25
26
27
28
29
30
31
32
33
34
35
36
37
38
39
40
41
42
43'''
需要修改两个位置
fileDir: 为xml文件所在的目录
outputName:为csv文件的输出名称
'''
import os
import glob
import pandas as pd
import xml.etree.ElementTree as ET
fileDir = 'output/train' # xml文件夹地址
outputName = 'train.csv' # 生成csv文件地址
os.chdir(fileDir)
path = fileDir
def xml_to_csv(path):
xml_list = []
for xml_file in glob.glob('*.xml'):
tree = ET.parse(xml_file)
root = tree.getroot()
for member in root.findall('object'):
value = (root.find('filename').text,
int(root.find('size')[0].text),
int(root.find('size')[1].text),
member[0].text,
int(member[4][0].text),
int(member[4][1].text),
int(member[4][2].text),
int(member[4][3].text)
)
print('value: ', value)
xml_list.append(value)
column_name = ['filename', 'width', 'height', 'class', 'xmin', 'ymin', 'xmax', 'ymax']
xml_df = pd.DataFrame(xml_list, columns=column_name)
return xml_df
def main():
image_path = path
xml_df = xml_to_csv(image_path)
xml_df.to_csv(outputName, index=None)
print('Successfully converted xml to csv.')
main()

csv转换为TFRcords Format
由于使用到的TensorFlow Object Detection API数据输入格式为TFRcords Format,所以还需要进行一次csv格式转换。1
2
3
4
5
6
7
8
9
10
11
12
13
14
15
16
17
18
19
20
21
22
23
24
25
26
27
28
29
30
31
32
33
34
35
36
37
38
39
40
41
42
43
44
45
46
47
48
49
50
51
52
53
54
55
56
57
58
59
60
61
62
63
64
65
66
67
68
69
70
71
72
73
74
75
76
77
78
79
80
81
82
83
84
85
86
87
88
89
90
91
92
93
94
95
96
97
98
99
100
101
102
103
104
105
106
107
108
109
110
111
112'''
使用:
# csv_input为输入的csv文件目录,output_path为输出的文件目录
python csv2record.py --csv_input=data/train.csv --output_path=data/train.record
需要修改两个位置(标记为修改处):
#1. 'images/train'为图片所在目录
path = os.path.join(os.getcwd(), 'images/train')
#2. 对应的标签返回一个整数,后面需要使用
def class_text_to_int(row_label):
if row_label == 'floors':
return 1
elif row_label == 'toutu':
return 2
else:
None
'''
import os
import io
import pandas as pd
import tensorflow as tf
from PIL import Image
from object_detection.utils import dataset_util
from collections import namedtuple, OrderedDict
# 切换到脚本所在目录
# py_dir = '/'
# print(os.getcwd())
# os.chdir(py_dir)
# print(os.getcwd())
flags = tf.app.flags
flags.DEFINE_string('csv_input', '', 'Path to the CSV input')
flags.DEFINE_string('output_path', '', 'Path to output TFRecord')
FLAGS = flags.FLAGS
# 修改处:标签数字对应
def class_text_to_int(row_label):
if row_label == 'floors':
return 1
elif row_label == 'toutu':
return 2
else:
None
'''
csv按照图片名分组;
将同一图片名中多个标记区域分为一组;
'''
def split(df, group):
data = namedtuple('data', ['filename', 'object']) # data有两个属性,filename和object
gb = df.groupby(group) # 按照'filename'对data中的数据进行分组
# data(filename, gb.get_group(x))存放每个图片名、该图片的相关信息
return [data(filename, gb.get_group(x)) for filename, x in zip(gb.groups.keys(), gb.groups)]
def create_tf_example(group, path):
with tf.gfile.GFile(os.path.join(path, '{}'.format(group.filename)), 'rb') as fid: # rb指定二进制形式读取图片
encoded_jpg = fid.read()
encoded_jpg_io = io.BytesIO(encoded_jpg)
image = Image.open(encoded_jpg_io)
width, height = image.size
filename = group.filename.encode('utf8')
image_format = b'jpg'
xmins = []
xmaxs = []
ymins = []
ymaxs = []
classes_text = []
classes = []
for index, row in group.object.iterrows():
xmins.append(row['xmin'] / width)
xmaxs.append(row['xmax'] / width)
ymins.append(row['ymin'] / height)
ymaxs.append(row['ymax'] / height)
classes_text.append(row['class'].encode('utf8'))
classes.append(class_text_to_int(row['class']))
tf_example = tf.train.Example(features=tf.train.Features(feature={
'image/height': dataset_util.int64_feature(height),
'image/width': dataset_util.int64_feature(width),
'image/filename': dataset_util.bytes_feature(filename),
'image/source_id': dataset_util.bytes_feature(filename),
'image/encoded': dataset_util.bytes_feature(encoded_jpg),
'image/format': dataset_util.bytes_feature(image_format),
'image/object/bbox/xmin': dataset_util.float_list_feature(xmins),
'image/object/bbox/xmax': dataset_util.float_list_feature(xmaxs),
'image/object/bbox/ymin': dataset_util.float_list_feature(ymins),
'image/object/bbox/ymax': dataset_util.float_list_feature(ymaxs),
'image/object/class/text': dataset_util.bytes_list_feature(classes_text),
'image/object/class/label': dataset_util.int64_list_feature(classes),
}))
return tf_example
def main(_):
writer = tf.io.TFRecordWriter(FLAGS.output_path)
path = os.path.join(os.getcwd(), 'images-test') # 修改处
examples = pd.read_csv(FLAGS.csv_input)
grouped = split(examples, 'filename')
for group in grouped:
tf_example = create_tf_example(group, path)
writer.write(tf_example.SerializeToString())
writer.close()
output_path = os.path.join(os.getcwd(), FLAGS.output_path)
print('Successfully created the TFRecords: {}'.format(output_path))
if __name__ == '__main__':
tf.compat.v1.app.run()
模型选取
tensorflow/models仓库提供了丰富的TensorFlow模型,目标检测API位于目录tensorflow/models/research/object_detection/models,本文选取的是ssd_mobilenet_v1_coco模型,更多的模型描述可以参照model zoo,需要对其中的*.config文件进行修改:1
2
3
4
5
6
7
8
9
10
11
12
13
14
15
16
17
18
19
20
21
22
23
24
25
26
27
28
29
30
31
32
33
34
35
36
37
38
39
40
41
42
43
44
45
46
47
48
49
50
51
52
53
54
55
56
57
58
59
60
61
62
63
64
65
66
67
68
69
70
71
72
73
74
75
76
77
78
79
80
81
82
83
84
85
86
87
88
89
90
91
92
93
94
95
96
97
98
99
100
101
102
103
104
105
106
107
108
109
110
111
112
113
114
115
116
117
118
119
120
121
122
123
124
125
126
127
128
129
130
131
132
133
134
135
136
137
138
139
140
141
142
143
144
145
146
147
148
149
150
151
152
153
154
155
156
157
158
159
160
161
162
163
164
165
166
167
168
169
170
171
172
173
174
175
176
177
178
179
180
181
182
183
184
185
186
187
188
189
190
191
192
193
194
195
196
197
198
199
200
201
202
203
204
205
206
207
208
209
210
211
212
213
214
215
216
217
218
219
220
221
222
223
224
225
226
227
228# SSD with Mobilenet v1 configuration for MSCOCO Dataset.
# Users should configure the fine_tune_checkpoint field in the train config as
# well as the label_map_path and input_path fields in the train_input_reader and
# eval_input_reader. Search for "PATH_TO_BE_CONFIGURED" to find the fields that
# should be configured.
'''
修改位置已标记为:修改处
1. ssd {
num_classes: 2
...
}
num_classes为标签类别数,此次训练有头图和楼层两个类型,所以为2
2. train_config: {
batch_size: 1
...
}
batch_size是每次迭代的数据数,这里设为1
3. train_input_reader: {
tf_record_input_reader {
input_path: "output/train.record"
}
label_map_path: "output/floors.pbtxt"
}
input_path是训练数据的路径,label_map_path是label路径都需要改为对应的路径
4. eval_input_reader: {
tf_record_input_reader {
input_path: "output/test.record"
}
label_map_path: "output/floors.pbtxt"
shuffle: false
num_readers: 1
}
input_path是测试数据的路径,label_map_path是label路径都需要改为对应的路径
5.fine_tune_checkpoint: "training/model.ckpt"
from_detection_checkpoint: true
由于是从头开始训练,不使用预训练的模型数据,所以这两行注释,如果是对预训练模型参数来进行微调,则该参数为模型位置
'''
model {
ssd {
num_classes: 2 # 修改处:标签类别数
box_coder {
faster_rcnn_box_coder {
y_scale: 10.0
x_scale: 10.0
height_scale: 5.0
width_scale: 5.0
}
}
matcher {
argmax_matcher {
matched_threshold: 0.5
unmatched_threshold: 0.5
ignore_thresholds: false
negatives_lower_than_unmatched: true
force_match_for_each_row: true
}
}
similarity_calculator {
iou_similarity {
}
}
anchor_generator {
ssd_anchor_generator {
num_layers: 6
min_scale: 0.2
max_scale: 0.95
aspect_ratios: 1.0
aspect_ratios: 2.0
aspect_ratios: 0.5
aspect_ratios: 3.0
aspect_ratios: 0.3333
}
}
image_resizer {
fixed_shape_resizer {
height: 300
width: 300
}
}
box_predictor {
convolutional_box_predictor {
min_depth: 0
max_depth: 0
num_layers_before_predictor: 0
use_dropout: false
dropout_keep_probability: 0.8
kernel_size: 1
box_code_size: 4
apply_sigmoid_to_scores: false
conv_hyperparams {
activation: RELU_6,
regularizer {
l2_regularizer {
weight: 0.00004
}
}
initializer {
truncated_normal_initializer {
stddev: 0.03
mean: 0.0
}
}
batch_norm {
train: true,
scale: true,
center: true,
decay: 0.9997,
epsilon: 0.001,
}
}
}
}
feature_extractor {
type: 'ssd_mobilenet_v1'
min_depth: 16
depth_multiplier: 1.0
conv_hyperparams {
activation: RELU_6,
regularizer {
l2_regularizer {
weight: 0.00004
}
}
initializer {
truncated_normal_initializer {
stddev: 0.03
mean: 0.0
}
}
batch_norm {
train: true,
scale: true,
center: true,
decay: 0.9997,
epsilon: 0.001,
}
}
}
loss {
classification_loss {
weighted_sigmoid {
anchorwise_output: true
}
}
localization_loss {
weighted_smooth_l1 {
anchorwise_output: true
}
}
hard_example_miner {
num_hard_examples: 3000
iou_threshold: 0.99
loss_type: CLASSIFICATION
max_negatives_per_positive: 3
min_negatives_per_image: 0
}
classification_weight: 1.0
localization_weight: 1.0
}
normalize_loss_by_num_matches: true
post_processing {
batch_non_max_suppression {
score_threshold: 1e-8
iou_threshold: 0.6
max_detections_per_class: 100
max_total_detections: 100
}
score_converter: SIGMOID
}
}
}
train_config: {
batch_size: 1 # 修改处:每次迭代数据量
optimizer {
rms_prop_optimizer: {
learning_rate: {
exponential_decay_learning_rate {
initial_learning_rate: 0.004
decay_steps: 800720
decay_factor: 0.95
}
}
momentum_optimizer_value: 0.9
decay: 0.9
epsilon: 1.0
}
}
# fine_tune_checkpoint: "training/model.ckpt" # 修改处
# from_detection_checkpoint: true # 修改处
# Note: The below line limits the training process to 200K steps, which we
# empirically found to be sufficient enough to train the pets dataset. This
# effectively bypasses the learning rate schedule (the learning rate will
# never decay). Remove the below line to train indefinitely.
num_steps: 200000
data_augmentation_options {
random_horizontal_flip {
}
}
data_augmentation_options {
ssd_random_crop {
}
}
}
train_input_reader: {
tf_record_input_reader {
input_path: "output/train.record" # 修改处:训练数据路径
}
label_map_path: "output/floors.pbtxt" # 修改处:label路径
}
eval_config: {
num_examples: 8000
# Note: The below line limits the evaluation process to 10 evaluations.
# Remove the below line to evaluate indefinitely.
max_evals: 10
}
eval_input_reader: {
tf_record_input_reader {
input_path: "output/test.record" # 修改处:测试数据路径
}
label_map_path: "output/floors.pbtxt" # 修改处:label路径
shuffle: false
num_readers: 1
}
上述*.config文件中涉及到的label映射文件floors.pbtxt,可以在TensorFlow/models/research/object_detection中找一个文件复制出来修改即可:1
2
3
4
5
6
7
8
9
10item {
name: "floors"
id: 1
display_name: "floor"
}
item {
name: "toutu"
id: 2
display_name: "toutu"
}
模型训练
- 将
models/research/object_detection/legacy/train.py复制到工作目录下。 - 安装
slim模块,借用models的环境,在models/research/slim目录下运行python setup.py install。 - 将slim库暴露到运行环境中
export PYTHONPATH=$PYTHONPATH:pwd:pwd/slim。 - Protobuf编译,在
models/research目录下执行protoc object_detection/protos/*.proto --python_out=.。
执行命令行如下:1
python train.py --logtostderr --train_dir=training/ --pipeline_config_path=training/ssd_mobilenet_v1_coco.config

如果没有报错,可以看到以上输出,慢慢等待模型训练结果即可。
可以通过以下命令看到优化的情况:1
tensorboard --logdir=training
模型效果展示
python模型导出
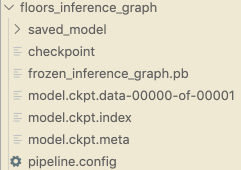
通过python测试模型效果不错,将模型导出为tensorflowjs可运行模式,将训练完成的模型导出,TensorFlow Object Detection API提供了一个export_inference_ graph.py脚本用于导出训练好的模型(位于models/research/object_detection目录下)。执行:1
python export_inference_graph.py --input_type image_tensor --pipeline_config_path training/ssd_mobilenet_v1_coco.config --trained_checkpoint_prefix training/model.ckpt-200000 --output_directory floors_inference_graph

将导出模型转换为TensorFlow.js可运行模型
将模型转换为TensorFlow.js可用的web格式:1
2
3
4
5
6
7
8
9
10
11# 模型转换器安装
pip install tensorflowjs
# 运行转换器提供的转换脚本,以下命令任选一
# 参考:https://github.com/tensorflow/tfjs-converter/tree/master/tfjs-converter
# covert from saved_model
tensorflowjs_converter --input_format=tf_saved_model --output_format=tfjs_graph_model --signature_name=serving_default --saved_model_tags=serve ./saved_model ./web_model
# convert from frozen_model
tensorflowjs_converter --input_format=tf_frozen_model --output_node_names='num_detections,detection_boxes,detection_scores,detection_classes' ./frozen_inference_graph.pb ./web_model
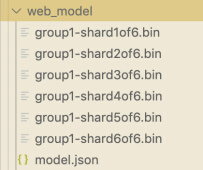
得到如下的TensorFlow.js可运行模型数据。
前端运行模型
此处只给出关键代码,需要注意的点是,输出数据维度名称与export_inference_graph.py中相对应。1
2
3
4
5
6
7
8
9
10
11
12
13
14// 导入本地模型
model = await tf.loadGraphModel('./web_model/model.json');
// 模型输入处理
let image = tf.browser.fromPixels(canvas);
const t4d = image.expandDims(0);
/**
* 获取所需的输出维度
* num_detections: 检测总数
* detection_boxes: 检测框张量,[ymin , xmin , ymax , xmax]为归一化数据,对应图片检测框位置只需乘以对应宽高
* detection_scores: 检测框分数,即概率
* detection_classes: 类别ID,与label_map中相对应
*/
let tensor = await model.executeAsync({'image_tensor': t4d}, `${dim}:0`);
modelOut[dim] = await tensor.data();
发散思考与深入
- 训练结果有一定随机性,增加少量数据不一定会越来越精准,所以模型的训练需要一定时间的数据集积累,才能得到较好结果;由于数据集限制,对于规整的设计稿识别效果显然更好。
- 需要测试图片颜色对识别效果的影响,后续可能需要加入交互稿的识别;对于多种类型的设计稿进行匹配,目前仅仅测试了会场类型;对于某些特殊、有显著特征的楼层类型可以进行更细致分类的识别,比如头图、优惠券等。
- 使用python训练的模型不一定能转换为tensorflowjs可运行模型,建议在哪个环境使用,就在哪个环境训练模型。不同的TensorFlow版本训练出的模型效果可能有很大差别,不能盲目使用新版本,容易出现未知bug无法解决。
- 楼层分割这个需求应用比较局限且比较困难。
楼层是一个复合结构,一个楼层可能有多个组件结合嵌套组成,情况较为复杂。组件维度的分割是更加有价值且合理的分割行为,且组件分割的应用也会更加广泛,例如在设计稿中识别某个组件及其类型,并与沉淀代码库进行匹配。近几年的一些设计图直接生成代码也采用类似的思路,比如微软的sketch2code,淘宝的imgcook。
问题记录
ModuleNotFoundError: No module named 'nets'
需要安装slim模块,如果借用tensorflow/models环境,则在models/research/slim目录下运行python setup.py install。另外需要将该模块暴露到环境中export PYTHONPATH=$PYTHONPATH:pwd:pwd/slim。其中pwd表示的是当前克隆目录,即research文件所在。ImportError: cannot import name 'preprocessor_pb2' from 'object_detection.protos'
需要protoc object_detection/protos/*.proto --python_out=.,参考issue2930ValueError: Unsupported Ops in the model before optimization LogSoftmax NonMaxSuppressionV5
python训练得到的模型不能百分百转换到tensorflowjs下运行,参考issue684建议加入参数--skip_op_check,可以转化成功但是生成的模型有问题。
tensorflowjs有许多操作不支持,幸好刚刚更新的版本加入了NonMaxSuppressionV5支持,升级到1.5.2版本搞定。- python安装tensorflowjs最新版本失败
python版本过高的问题,官方建议版本为3.6.8。 - 导出saved model的variables为空
参考issue1988,修改export.py中write_saved_model函数。
参考
[1] Training Custom Object Detector
[2] 目标检测Tensorflow object detection API之构建自己的模型
[3] Tensorflow Guide